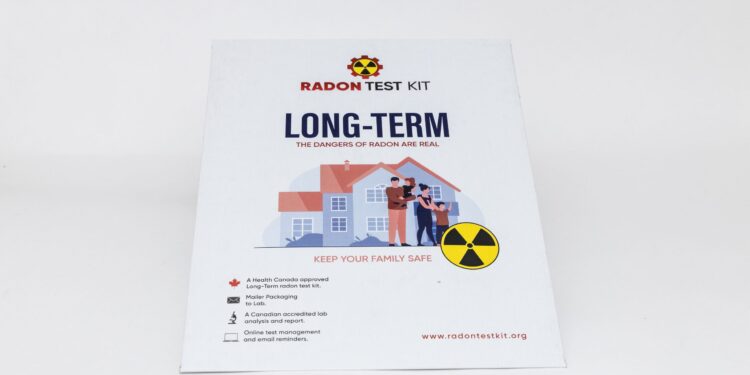
Are you aware of the invisible threat lurking beneath your home? Radon, a colorless and odorless gas that seeps from the ground, can pose serious health risks to you and your loved ones. But fear not – homeowners wield a powerful tool in their hands: DIY radon test kits! In this post, we’ll explore why these affordable and easy-to-use kits are essential for safeguarding your family’s health. From understanding how radon enters our homes to learning how simple testing can lead to peace of mind, discover why taking control of your indoor air quality is more important than ever. Let’s dive in and empower ourselves with knowledge – because every homeowner deserves a safe haven!
Introduction to Radon and its Dangers
When it comes to our homes, we often think about the visible threats: leaky roofs, creaky floors, or that pesky mold in the corner. But lurking beneath your feet might be a silent and deadly danger—radon. This invisible gas is produced from the natural decay of uranium in soil and rock, seeping into homes through cracks and openings. The scary part? Long-term exposure can lead to serious health issues, including lung cancer.
As a homeowner, you hold the key to safeguarding your family’s well-being. Knowing whether radon is present in your home should be at the top of your priority list. That’s where DIY radon test kits come into play—they’re not just tools; they’re essential for ensuring a safe living environment. Let’s dive deeper into why these kits are vital for every homeowner who values both peace of mind and their family’s health.
Importance of Testing for Radon in Your Home
Radon is a silent threat lurking in many homes. This colorless, odorless gas originates from the natural breakdown of uranium in soil and rock. It seeps into houses through cracks and openings, often without detection.
Testing for radon is crucial because prolonged exposure increases the risk of lung cancer. The Environmental Protection Agency (EPA) indicates that radon is the second leading cause of lung cancer after smoking. Homeowners may unknowingly expose their families to this hazardous element.
Regular testing allows you to identify potential risks early on. It empowers you to take action before serious health concerns arise. Many people mistakenly believe their homes are safe simply because they feel fine.
By prioritizing radon testing, you’re actively safeguarding your loved ones’ well-being against an invisible danger that could be hiding right under your feet. Taking charge today can lead to a healthier tomorrow for your family.
DIY Radon Test Kits vs Professional Testing: Pros and Cons
When it comes to testing for radon, homeowners often face a choice between long term radon test kit Ontario and professional services. Each option has its own advantages and drawbacks.
DIY radon test kits offer convenience and affordability. You can easily purchase them online or at hardware stores. These kits allow you to conduct the test on your schedule, making it a flexible option for busy families.
On the other hand, professional testing provides expertise you might not have with a DIY kit. Licensed professionals use advanced equipment that can yield more accurate results in less time. However, this service typically comes with a higher price tag.
Consider your comfort level with home improvement tasks when deciding the best route for your situation. Both methods are valid; understanding their pros and cons will help ensure you’re well-informed before taking action against potential radon exposure in your home.
How to Use a DIY Radon Test Kit
Using a DIY radon test kit is straightforward and can be done in just a few simple steps. First, ensure that you choose an appropriate location for the test. The ideal spots are usually the lowest lived-in level of your home, like the basement or ground floor.
Once you’ve selected your spot, open the kit and carefully read the instructions provided. Each
kit may have slight variations, so following specific guidelines is crucial.
Place the testing device on a flat surface away from drafts or direct sunlight to avoid interference with measurements. Leave it there undisturbed for at least 2-7 days, depending on what your kit recommends.
After the waiting period ends, seal up your test device as instructed and mail it back to the lab for analysis. Make sure you keep track of any necessary forms included in your package to ensure accurate processing of results.
Interpreting Test Results and What They Mean
Once you receive the results from your radon test kit, it’s crucial to understand what those numbers mean. Radon levels are measured in picocuries per liter (pCi/L). The U.S. Environmental Protection Agency suggests that any level above 4 pCi/L is a cause for concern.
If your results come back below this threshold, that’s good news. However, even lower levels can still pose some risk over time. Continuous exposure to radon—even at low concentrations—can affect health.
Should your test reveal elevated radon levels, don’t panic right away. This simply means it’s time to take action and explore mitigation options. Knowing how to interpret these figures empowers homeowners to make informed decisions about their living environment.
Remember, testing isn’t just a one-time event; consider periodic checks as part of regular home maintenance for long-term safety.
Steps to Take If Your Home Has High Levels of Radon
If your radon test reveals high levels, don’t panic. The first step is to confirm the results with a second test. This ensures accuracy before taking further action.
Next, consider contacting a certified radon mitigation professional. They have the expertise to
assess your home and recommend effective solutions tailored to your situation.
Common remediation methods include installing a ventilation system or sealing cracks in floors and walls. These approaches can significantly lower radon levels in most homes.
Additionally, make sure you keep windows open when weather permits; this helps improve air circulation and reduces indoor concentrations temporarily.
Regular retesting after mitigation is essential. It helps ensure that radon levels remain low over time for ongoing peace of mind regarding your family’s health.
Tips for Reducing Radon Levels in Your Home
To effectively reduce radon levels in your home, start by sealing cracks and openings in your foundation. Simple materials like caulk can make a significant difference.
Next, consider improving ventilation. Increasing airflow can help disperse radon gas and lower concentrations indoors. You might want to install vents or use fans to circulate fresh air.
Another option is to install a radon mitigation system. These systems actively vent radon from beneath the house to the outdoors, preventing it from accumulating inside.
Regularly test for radon even after taking these steps. This ensures that levels remain safe over time.
Lastly, educate yourself about building codes related to radon when renovating or constructing new spaces. Following these guidelines can help keep your home safer right from the start.
Other Benefits of Using a DIY Radon Test Kit
Using a DIY radon test kit brings more than just peace of mind about your home’s safety. They are typically affordable and accessible, making it easy for any homeowner to get started.
Many kits require minimal effort to set up, allowing you to conduct the test with little disruption to your daily life. This convenience means you can fit testing into your schedule effortlessly.
Moreover, these kits often come with detailed instructions and customer support options. This guidance empowers homeowners by enhancing their knowledge about radon exposure and remediation methods.
Additionally, using a DIY kit fosters a sense of ownership over home safety. Homeowners become proactive in understanding environmental risks rather than relying solely on external professionals.
Lastly, regular testing encourages ongoing vigilance regarding air quality—an essential aspect of maintaining a healthy living environment for everyone in the household.
Conclusion:
Radon is a silent threat lurking in many homes. It’s crucial for homeowners to take the necessary steps to protect themselves and their families from this dangerous gas. DIY radon test kits provide an accessible, affordable means of monitoring your home’s air quality.
By using these kits, you can quickly detect whether radon levels are at a safe threshold or if further action is needed. Regular testing not only promotes peace of mind but also empowers you to make informed decisions about potential remediation.
Remember that knowledge is power when it comes to health risks like radon exposure. By actively engaging in the process of testing and mitigating any issues, you’re taking significant strides toward safeguarding your household against unseen dangers nestled within its walls. Embrace the responsibility and ensure your family breathes easy knowing they are protected from harmful pollutants like radon.


